You’ve done some complex work to create a scene that merges the added components with an existing tableau. You’ll preview it to see it in action.
- Press the Home key or move the current-time indicator to the beginning of the time ruler.
- Press the spacebar to preview the movie. Let it play through completely once to cache the video and audio; once it’s cached, it should play in real time.
- Press the spacebar again to stop playback.
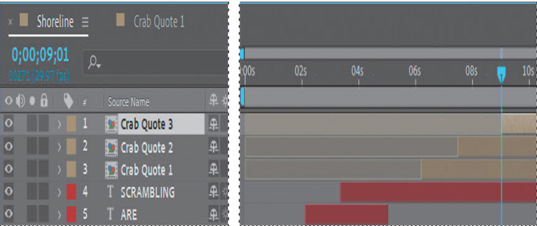
It’s looking pretty good, but the word ARE may show up unexpectedly toward the end, and the crab quotes all appear at once. You’ll adjust layers to ensure they appear when you want them to.
- Go to 5:00, select the ARE layer, and press Alt+] or Option+].
- Go to 6:06, select the Crab Quote 1 layer, and press Alt+[ or Option+[.
- Go to 7:15, select the Crab Quote 2 layer, and press Alt+[ or Option+[.
- Go to 9:01, select the Crab Quote 3 layer, and press Alt+[ or Option+[.
- Press the spacebar to preview the movie again. Now the text and quotes appear when you expect them to.
- Press the spacebar again to stop playback.
- Choose File > Save to save your work so far.
Adding a final object
Without the company logo, no one will know who has the competition scrambling. You’ll add the logo to the end of the movie using another solid layer.
- Go to 11:15, select the Shoreline.mov layer, and select the 3D Camera Tracker effect in the Effect Controls panel again. Change the Track Point Size and Target Size back to 100%.
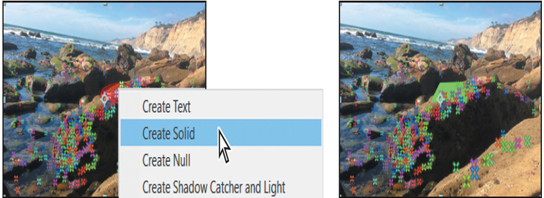
- Find a plane that is relatively flat on a rock, right-click the target, and choose Create Solid.
- Right-click or Control-click the Track Solid 1 layer, choose Pre-compose, name the composition Logo, and click OK.
- Double-click the Logo composition to open it. Delete the Track Solid 1 layer, and then drag the BlueCrabLogo.psd file into the Timeline panel. With the BlueCrabLogo.psd layer selected, choose Layer > Transform > Fit To Comp.
- Select the Shoreline Timeline panel, and then select the Logo layer.
- Use the 3D Transformation Gizmo to rotate the logo as shown. (Our Orientation values are 0, 60, 0.) Then, use the Selection tool ( ) to drag the logo up to rest on the rock.
- In the Properties panel, click the stopwatch icons ( ) to create initial keyframes for the Position, Scale, and Orientation properties.
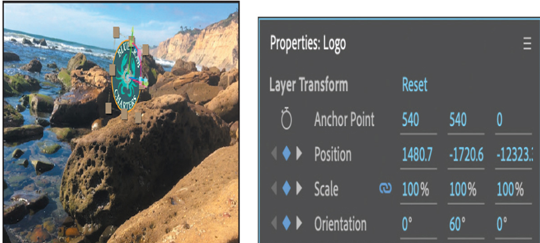
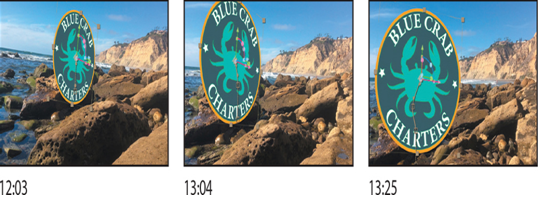
- Go to 12:03, and increase the Scale value (we used 190.5%). Adjust the position and orientation as needed to match the image below.
- Go to 13:04, and increase the Scale value again (we used 249%). Adjust the position if necessary to match the image below.
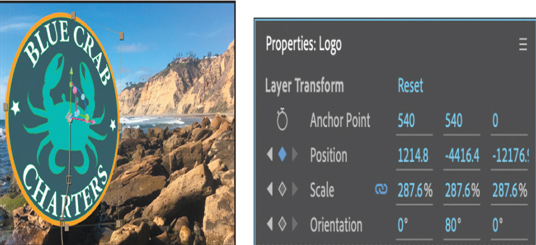
- Go to 13:25, and increase the Scale value again (we used 285.2%). Adjust the orientation so that the logo faces forward; adjust the position to match the image below.
- Go to 14:29, and adjust the position for the final shot. Hide all layer properties.