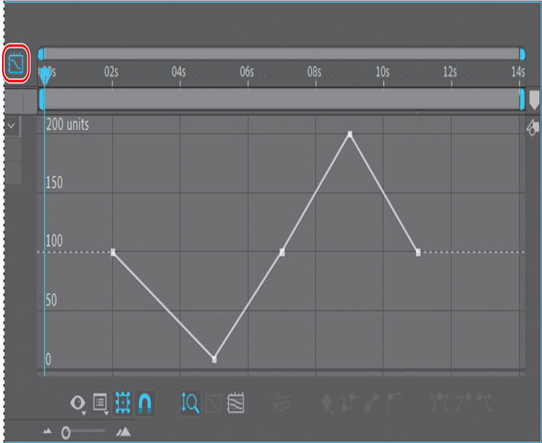
The speed adjustments are rather abrupt—not the smooth, slow-motion curve you would expect to see in a professional effect. This is because the keyframes are linear instead of curved. You’ll fix that next.
- Press the spacebar to stop playback when you’re ready.
- Click the Graph Editor button in the Timeline panel to display the Graph Editor instead of the layer bars. Make sure the Speed property name for the spinning_dog layer is selected. The Graph Editor displays its graph.
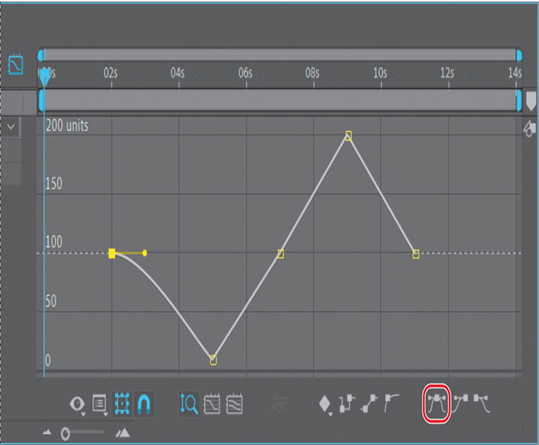
- Click to select the first Speed keyframe (at 2:00), and then click the Easy Ease icon ( ) at the bottom of the Graph Editor.
Tip
Close columns in the Timeline panel to see more icons in the Graph Editor. You can also apply an Easy Ease adjustment by pressing the F9 key.
Note
If you click the Speed property a second time, all the keyframes are selected and changes you make to one affect all of them.
This adjusts the influence into and out of the keyframe to smooth out sudden changes.
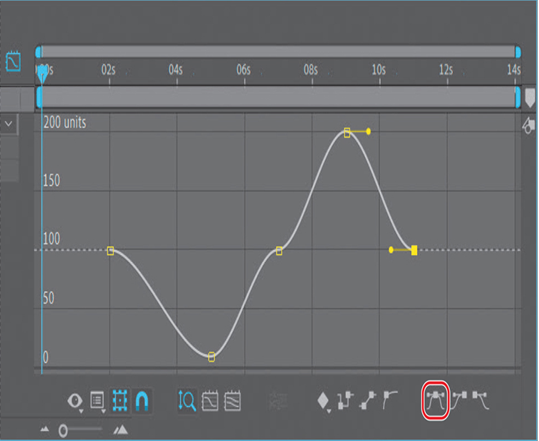
- Repeat step 14 for the other Speed keyframes in the motion graph, at 5:00, 7:00, 9:00, and 11:00.
Tip
You can tweak a motion graph by dragging the Bezier handles. You used Bezier handles in Lesson 7, “Working with Masks.”
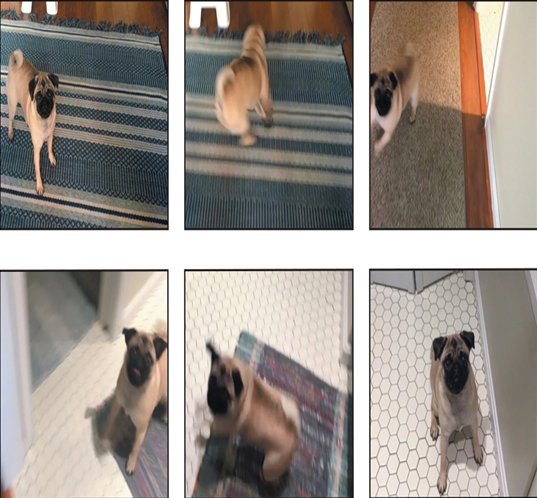
- Preview the movie again. This time, the slow-motion Timewarp effect transitions are smoother.
- Choose File > Save to save the project, and then choose File > Close Project.
You’ve now experimented with some of the advanced features in After Effects, including motion stabilization, motion tracking, particle systems, content-aware fill, and the Timewarp effect. To render and export any or all of the projects you completed in this lesson, see Lesson 15, “Rendering and Outputting,” for instructions.
Review questions
1 What is Warp Stabilizer VFX, and when do you need to use it?
2 Why might drifting occur when you’re tracking an image?
3 What is the birth rate in a particle effect?
4 What does the Timewarp effect do?
Review answers
1 Shooting footage using a handheld camera typically results in shaky shots. Unless this look is intentional, you will want to stabilize the shots to eliminate unwanted motion. Warp Stabilizer VFX in After Effects analyzes the movement and rotation of the target layer, and then makes adjustments to it. When played back, the motion appears smooth, because the layer itself moves incrementally to offset the unwanted motion. You can change the way Warp Stabilizer VFX crops, scales, and performs other adjustments by modifying settings for the effect.
2 Drifting occurs when the feature region loses the feature that’s being tracked. As an image moves in a shot, the lighting, surrounding objects, and angle of the object can change, making a once-distinct feature unidentifiable at the subpixel level. Even with careful planning and practice, the feature region often drifts away from the desired feature. Readjusting the feature and search regions, changing the tracking options, and trying again are all standard procedures in digital tracking.
3 The birth rate in a particle effect determines how often new particles are created.
4 The Timewarp effect gives you precise control over a wide range of parameters to change the playback speed of a layer, including interpolation methods, motion blur, and source cropping to eliminate unwanted artifacts.