You’ve set up two versions of your movie in the queue. Now you’ll render and view them. Rendering is resource-intensive, and it can take a while, depending on your system, the complexity and length of the composition, and the settings you use.
- Click the green Start Queue button (
) in the upper right corner of the Queue panel.
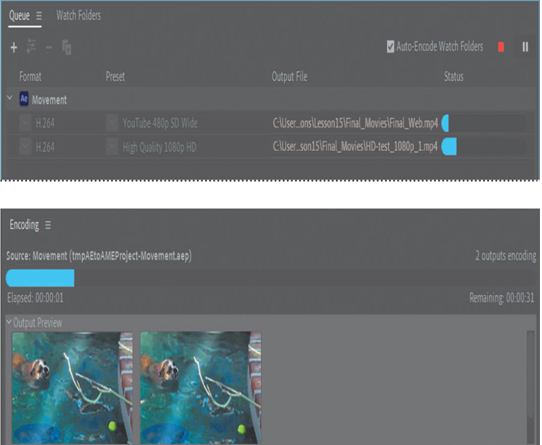
Depending on your system, this may take a while.
Adobe Media Encoder encodes the movies in the queue simultaneously, displaying a status bar and reporting the estimated time remaining.
- When Adobe Media Encoder has finished, navigate to the Final_Movies folder in the Finder or Explorer, and double-click your files to play them.
Tip
If you forget where you saved your encoded movies, click the blue link in the Output File column next to the finished movie. Adobe Media Encoder opens a window to show you where your files were saved.
Creating custom presets for Adobe Media Encoder
In most cases, one of the default Adobe Media Encoder presets will be appropriate for your project. However, you can create your own encoding presets if you have specialized needs. In this case, you’ll create a preset that renders a lower-resolution file for YouTube more quickly than the one you just encoded.
- Click the Create New Preset Group button (
) at the top of the Preset Browser panel, and give the group a unique name, such as your name.
- Click the Create New Preset button (
), and choose Create Encoding Preset.
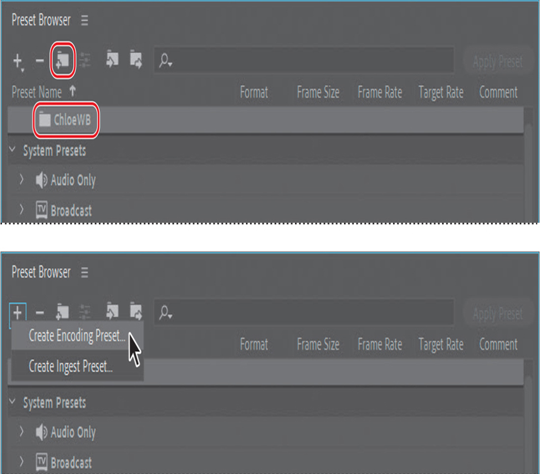
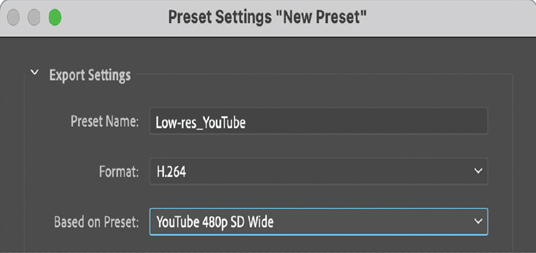
- Do the following in the Preset Settings dialog box:
• Name the preset Low-res_YouTube.
• Make sure H.264 is chosen from the Format menu.
• Choose YouTube 480p SD Wide from the Based On Preset menu.
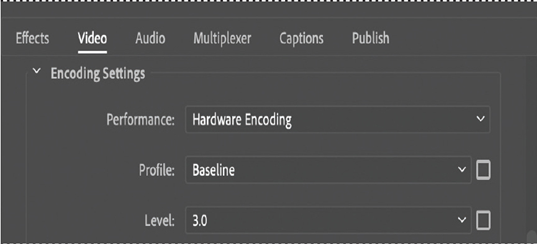
• Select the Video tab, if it’s not already selected.
• For Frame Rate, deselect Based On Source.
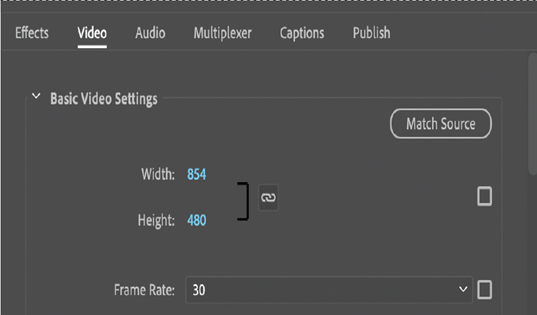
• Choose Baseline from the Profile menu. (You may need to scroll down to see it and the following options.)
• Choose 3.0 from the Level menu.
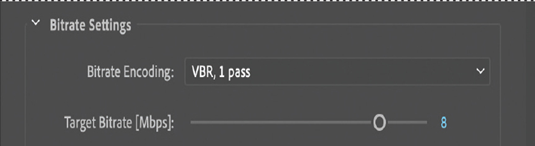
- Make sure VBR, 1 Pass is chosen from the Bitrate Encoding menu.
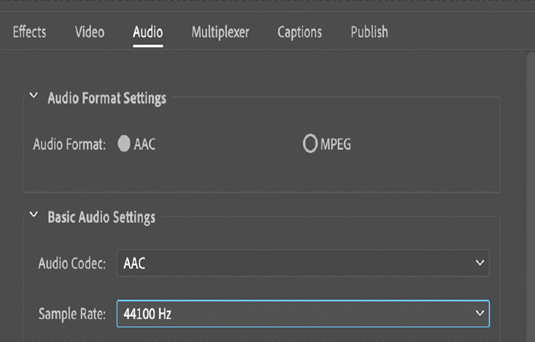
- Click the Audio tab, and choose 44100 Hz from the Sample Rate menu.
- Click OK to close the Preset Settings dialog box.
- Drag the Low-res_YouTube preset onto the Movement composition in the Queue panel.
- Click the blue link in the Output File column. Then name the file Lowres_YouTube, specify the Lessons/Lesson15/Final_Movies folder, and click Save or OK.
- Click the Start Queue button ( ).
With the settings in your new preset, the movie encodes more quickly. However, the quality isn’t as high.
- When Adobe Media Encoder has finished, navigate to the Final_Movies folder in Explorer or the Finder, and double-click the Lowres_YouTube movie to view it.
You have created both a web version and a broadcast version of the final composition.