Warp Stabilizer VFX starts analyzing footage as soon as you apply it. Stabilization is a background process, so you can work on other compositions while it finishes. How long it takes depends on your system. After Effects displays a blue banner while it analyzes the footage and an orange banner while it applies stabilization.
- Select the snowday.mov layer in the Timeline panel, and choose Animation > Warp Stabilizer VFX. The blue banner appears immediately.
- When Warp Stabilizer VFX has finished stabilizing and the orange banner has disappeared, press the spacebar to preview the changes.
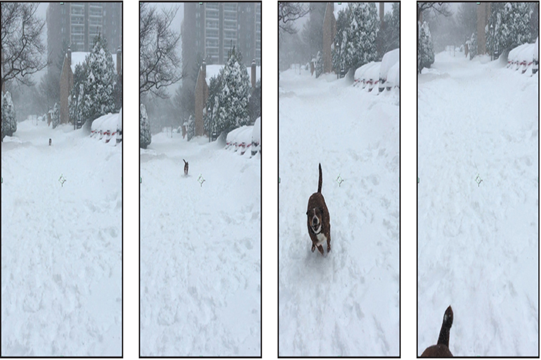
3. Press the spacebar to stop the preview.
The clip is still shaky, but it’s smoother than it was initially.
- Choose Window > Effect Controls to open the Effect Controls panel if it’s not already open.
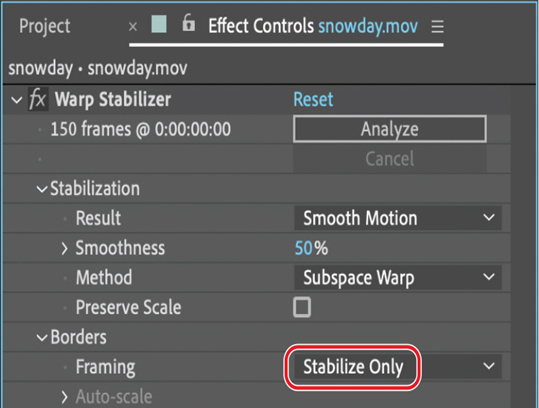
Warp Stabilizer VFX moved and repositioned the footage using its default settings. To see how it applied changes, view the effects in the Effect Controls panel. For example, the clip’s borders were scaled up (to about 140%) to hide black gaps that occur when the image is repositioned in the stabilization process. You’ll change the Framing setting to see how stabilization affects the image without scaling. - Choose Stabilize Only from the Framing menu in the Effect Controls panel.
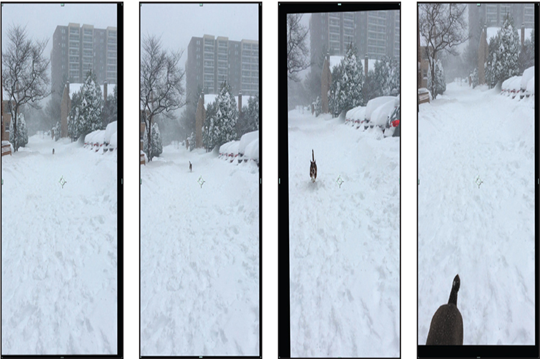
6. Press the spacebar to preview the clip. The border shifts throughout the clip. Press the spacebar again to stop the preview.
- Choose Stabilize, Crop, Auto-Scale from the Framing menu again.
Removing motion blur
If there are moments of blurriness after you stabilize the shot, try applying the Camera Shake Deblur effect. This effect analyzes frames on either side of the blurry frames for apparent sharpness and then blends the non-motion-blurred frames into the blurry frames.
The effect works best on brief moments of blur caused by wind or camera bumps.
Adjusting the Warp Stabilizer VFX settings
You’ll change the settings in the Effect Controls panel to make the shot smoother.
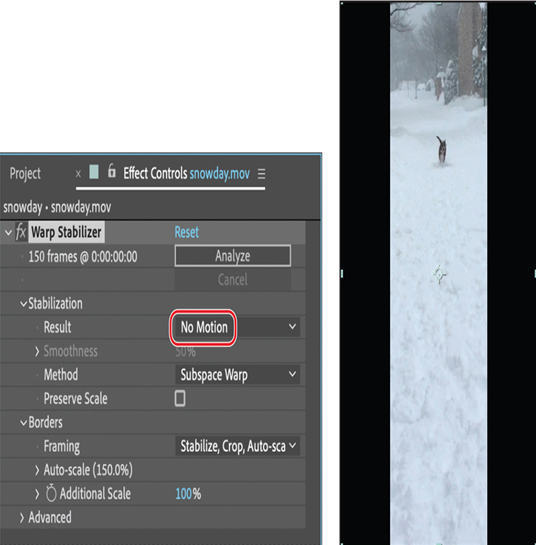
- In the Effect Controls panel, choose No Motion from the Result menu.
With this setting, Warp Stabilizer VFX attempts to lock the camera in position. This requires even more scaling. When No Motion is selected, the Smoothness option is dimmed.
Warp Stabilizer VFX immediately begins stabilizing again. It doesn’t need to analyze the footage, because the initial analysis data is stored in memory. - When the orange banner disappears, preview the changes again. Press the spacebar to stop the playback.
The camera is much steadier. But in order to achieve this effect, Warp Stabilizer VFX had to scale the clip considerably and it warps the clip in some distracting ways. You’ll manually adjust the settings to have more control.
- In the Effect Controls panel, choose Smooth Motion from the Result menu. Then increase the Smoothness amount to 100%.
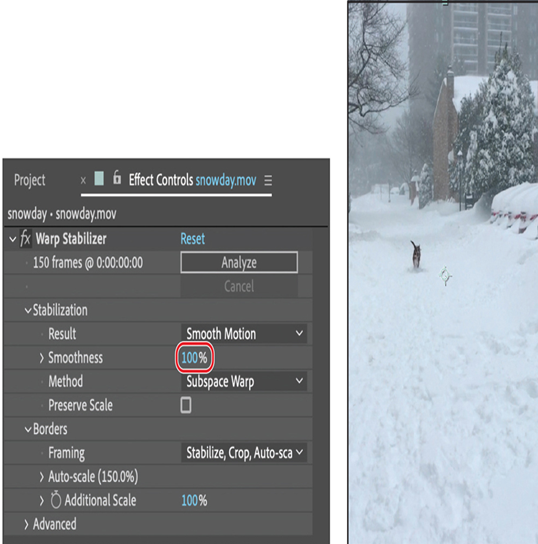
Again, Warp Stabilizer VFX begins stabilizing the image immediately.
- When Warp Stabilizer VFX has finished, preview the changes again.