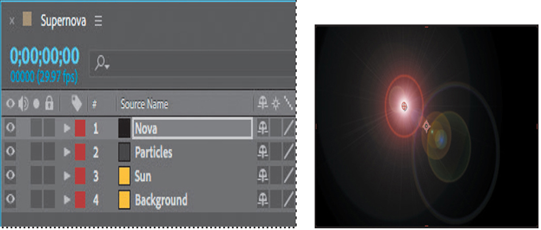
To tie all the elements together, you’ll add a lens flare to simulate an explosion.
- Press the Home key or move the current-time indicator to the beginning of the time ruler.
- Press Ctrl+Y (Windows) or Command+Y (macOS) to create a new solid layer.
- In the Solid Settings dialog box, name the layer Nova, click the Make Comp Size button to make the layer the same size as the composition, set the Color to black (R=0, G=0, B=0), and then click OK.
- Drag the Nova layer to the top of the layer stack in the Timeline panel. Then, with the Nova layer selected, choose Effect > Generate > Lens Flare.
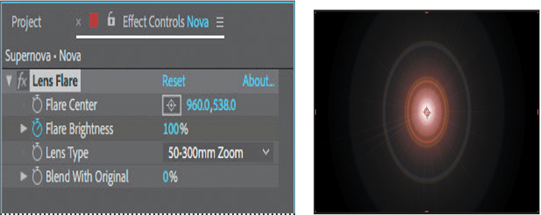
- In the Lens Flare area of the Effect Controls panel, do the following:
• Change Flare Center to 960, 538.
• Make sure 50–300mm Zoom is selected in the Lens Type menu.
• Decrease Flare Brightness to 0%, and then click the Flare Brightness stopwatch icon ( ) to create an initial keyframe. - Go to 0:10.
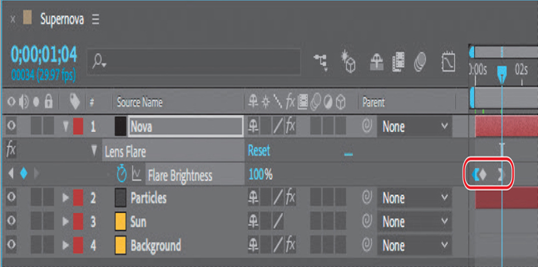
- Increase the Flare Brightness to 240%.
- Go to 1:04, and decrease the Flare Brightness to 100%.
- With the Nova layer selected in the Timeline panel, press the U key to see the animated Lens Flare property.
- Right-click or Control-click the ending Flare Brightness keyframe, and choose Keyframe Assistant > Easy Ease In.
- Right-click or Control-click the beginning Flare Brightness keyframe, and choose Keyframe Assistant > Easy Ease Out.
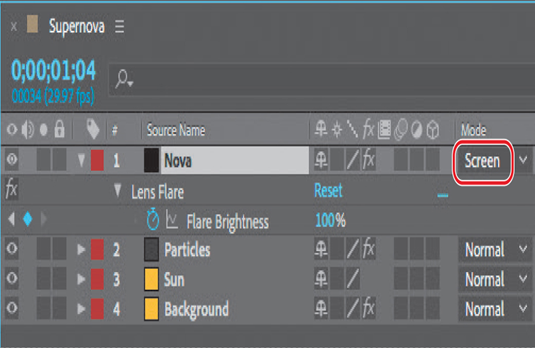
Finally, you need to make the layers under the Nova layer visible in the composition.
- Press F2 to deselect all layers, and choose Columns > Modes from the Timeline panel menu. Then choose Screen from the Mode menu for the Nova layer.
- Preview the movie. When you’re done, press the spacebar to stop the preview.
- Choose File > Save, and then choose File > Close Project.
About high dynamic range (HDR) footage
After Effects supports high dynamic range (HDR) color.
The dynamic range (ratio between dark and bright regions) in the physical world far exceeds the range of human vision and of images that are printed or displayed on a monitor. But while human eyes can adapt to very different brightness levels, most cameras and computer monitors can capture and reproduce only a limited dynamic range. Photographers, motion-picture artists, and others working with digital images must be selective about what’s important in a scene, because they’re working with a limited dynamic range.
HDR footage opens up a world of possibilities, because it can represent a very wide dynamic range through the use of 32-bit floating-point numeric values. Floating-point numeric representations allow the same number of bits to describe a much larger range of values than integer (fixed-point) values. HDR values can contain brightness levels, including objects as bright as a candle flame or the sun, that far exceed those in 8-bit-per-channel (bpc) or 16-bpc (non-floating-point) mode. Lower dynamic range 8-bpc and 16-bpc modes can represent RGB levels only from black to white, which comprises an extremely small segment of the dynamic range in the real world.
After Effects supports HDR images in a variety of ways. For example, you can create 32-bpc projects to work with HDR footage, and you can adjust the exposure, or the amount of light captured in an image, when working with HDR images in After Effects. For more information about support in After Effects for HDR images, see After Effects Help.