Rendering a composition creates the frames of a movie from all the layers, settings, effects, and other information that makes up the model for that image. After Effects renders content every time it creates a preview, but this lesson focuses on the rendering process that occurs when you’ve completed your composition and are ready to share your movie. You can generate a final movie file using the Render Queue panel in After Effects or Adobe Media Encoder. (Render Queue uses an embedded version of Adobe Media Encoder to encode most movie formats, but doesn’t include all the features of the separate application.)
When you use the Render Queue to create your final output, there are two steps to the process: After Effects renders the composition and then encodes the rendered frames into output files. In the Render Queue, the first step is governed by the render settings you’ve selected, and the second by the selected output module.
Adobe recommends that you use Adobe Media Encoder to create a high-quality movie file that is compressed for the web, DVD, or Blu-ray disc.
Exporting using the Render Queue
You can export a movie using the Render Queue at any stage in the process—whether you’re creating a sample for a client to review, producing a low-res version to check the timing, or creating a final high-resolution movie. The settings you choose for each purpose are different, but the process is the same.
You’ll export a draft version of the On the Move movie using the Render Queue.
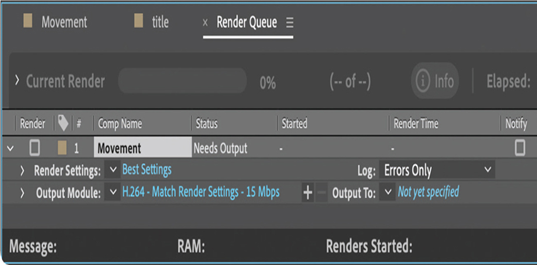
- Select the Movement composition in the Project panel, and choose Composition > Add To Render Queue.
Tip
Alternatively, you can drag the composition from the Project panel onto the Render Queue panel.
After Effects opens the Render Queue panel. The Movement composition is in the queue. Note the default settings in the Render Settings and Output Module pop-up menus; by default, After Effects produces a full-size high-quality movie. You’ll change the settings to create a low-resolution test file that will render quickly.
- Click the arrow to the right of Render Settings, and choose Draft Settings. Then, click the words Draft Settings.
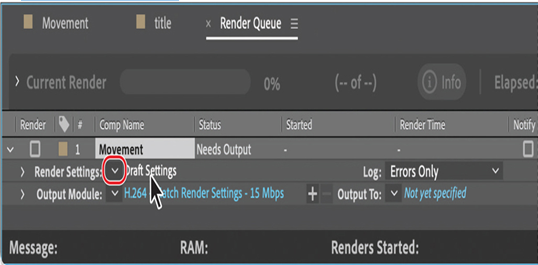
After Effects opens the Render Settings dialog box. You’ll use most of the settings preselected in the Draft Settings template, but you’ll reduce the resolution and ensure the entire composition is rendered.
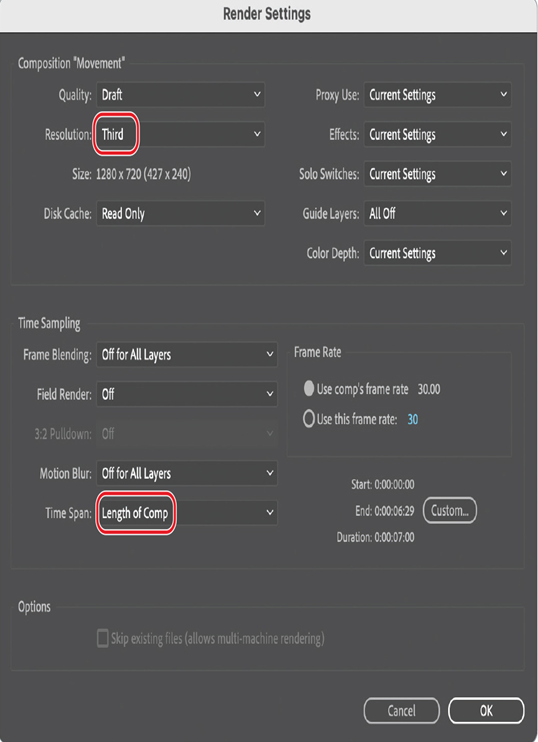
- In the Render Settings dialog box, choose Third for Resolution.
When you choose Third, After Effects renders one-ninth of the pixels in the composition: one-third of the rows and one-third of the columns. - In the Time Sampling area, choose Length of Comp for Time Span.
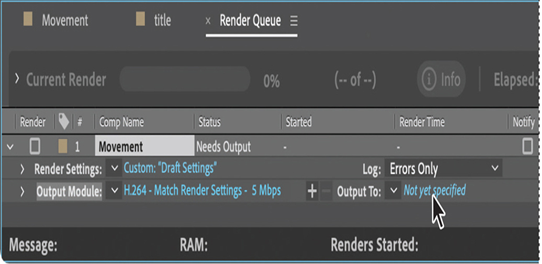
- Click OK to close the Render Settings dialog box.
- Choose H.264–Match Render Settings–5 Mbps from the Output Module pop-up menu.
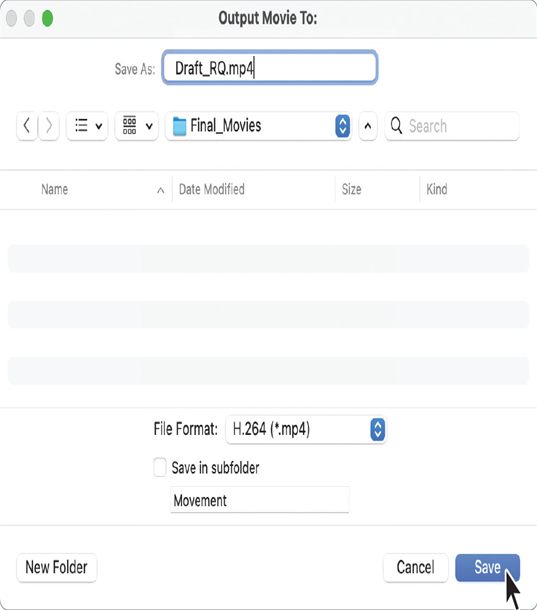
- Click the blue words next to Output To.
- In the Output Movie To dialog box, locate the Lessons/Lesson15 folder, and create a new folder called Final_Movies:
• In Windows, click New Folder, and then type the name for the folder.
• In macOS, click the New Folder button, name the folder, and click Create. - Open the Final_Movies folder, if it’s not already open.
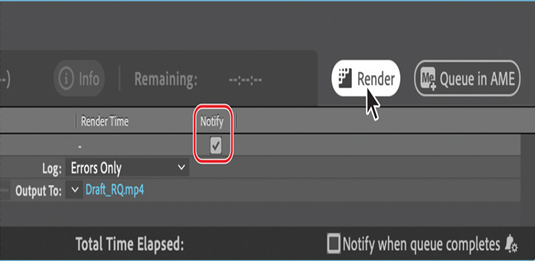
- Name the file Draft_RQ.mp4, and then click Save to return to the Render Queue panel.
- Select the Notify checkbox in the Render Queue panel.
When Notify is selected, you’ll receive notifications in the Creative Cloud Desktop (Windows and macOS) and Creative Cloud Mobile (iOS and Android) apps, as well as on Apple Watch or other connected devices. - Click the Render button in the Render Queue panel.
Tip
Select Notify When Queue Completes in the lower-right area of the Render Queue panel to receive a notification when all jobs in the queue finish rendering.
Note
You do not need to render a movie multiple times to export it to multiple formats with the same render settings. You can export multiple versions of the same rendered movie by adding output modules to a render item in the Render Queue panel.
After Effects renders the movie. If there were additional movies—or the same movie with different settings—in the queue, After Effects would render those, too.
- Navigate to the Lessons/Lesson15/Final_Movies folder, and then double-click your movie to preview it.
If you need to make any final changes to the movie, reopen the composition and make those adjustments now. Remember to save your work when you finish, and then output the test movie again using the appropriate settings. Next, you’ll proceed with outputting the movie for full-resolution broadcast.